
How to Boil Corn on the Cob: The Ultimate Guide to Perfectly Cooked Sweet Corn
Boiling corn on the cob is a simple yet surprisingly nuanced process. Get it right, and you’ll enjoy sweet, juicy kernels bursting with flavor. Get it wrong, and you’ll end up with tough, flavorless disappointment. This comprehensive guide will walk you through every step, from selecting the freshest corn to achieving that perfect balance of tenderness and sweetness.
Choosing the Perfect Corn
The key to delicious boiled corn starts long before the water even boils. Choosing the right corn is crucial. Here’s what to look for:
- Look for fresh corn in season: Summer is the prime time for sweet corn. Farmers’ markets are a great place to find the freshest options.
- Check the husks: The husks should be bright green and tightly wrapped around the ears. Avoid corn with wilted or dry husks.
- Feel the silks: Gently peel back a bit of the husk to check the silks. They should be moist and light brown or golden, not dark brown or dried out.
- Test the kernels: Gently press on a kernel or two. They should be plump and full, not dry or shrunken.
Preparing the Corn for Boiling
Once you’ve selected your perfect corn, it’s time to prepare it for boiling. This step is important for ensuring even cooking and maximum flavor retention:
- Remove the silks: Carefully peel back the husks and remove the silks. Discard the silks.
- Wash the corn: Rinse the corn under cold water to remove any dirt or debris.
- Optional: Leave the husks on (for a unique flavor): While removing the husks is common, leaving them on can add a slightly smoky and sweet flavor to the corn. If you choose this method, soak the corn in water for 30 minutes before boiling to help prevent burning.
- Optional: Remove some kernels for later: If you’re planning on using some of the corn for other dishes, you can easily remove some kernels before boiling.
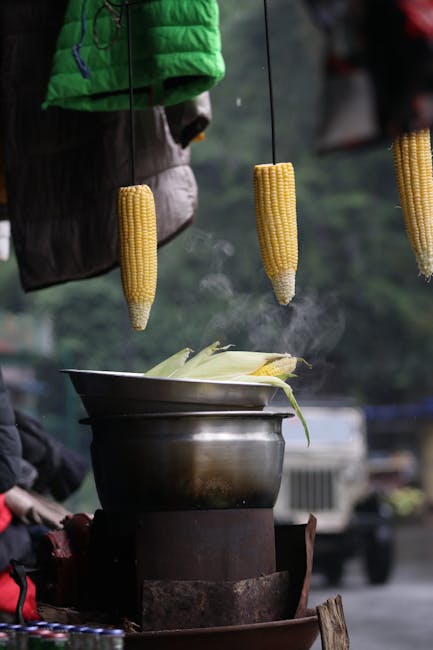
Boiling the Corn: Step-by-Step Instructions
Now comes the main event – boiling the corn! Here’s a step-by-step guide to ensure perfectly cooked corn every time:
- Fill a large pot with water: Use enough water to fully submerge the corn. A general rule is to use about 6-8 cups of water for every 4 ears of corn.
- Add salt (optional): Adding a tablespoon or two of salt to the water enhances the flavor of the corn. Some prefer to salt the corn after boiling.
- Bring the water to a rolling boil: Make sure the water is at a full, vigorous boil before adding the corn.
- Add the corn: Gently place the corn ears into the boiling water. Avoid overcrowding the pot to ensure even cooking.
- Reduce heat slightly: Once the corn is in, reduce the heat slightly to maintain a steady boil, not a rolling boil.
- Cook for the appropriate time: The cooking time depends on the freshness and size of the corn. Generally, fresh corn takes 5-7 minutes, while older corn may require 8-10 minutes. The corn is done when the kernels are tender but still have a slight bite to them.
- Test for doneness: To check for doneness, remove an ear of corn and carefully pierce a kernel with a sharp knife or fork. If the kernel is easily pierced and tender, the corn is ready.
- Remove from heat: Once the corn is cooked, remove it from the boiling water using tongs or a slotted spoon.
- Serve immediately: For the best flavor and texture, serve the corn immediately after cooking. You can add butter, salt, pepper, or your favorite seasonings.
Troubleshooting Common Problems
Even with careful preparation, you might encounter some problems. Here are solutions to common issues:
Tough Corn:
Tough corn is often a sign of overcooked or older corn. To avoid this, reduce the cooking time slightly, and opt for the freshest corn possible.
Mushy Corn:
Mushy corn is a sign of overcooking. Use a timer to ensure you don’t cook the corn for too long. Try checking for doneness earlier than the recommended time.
Unevenly Cooked Corn:
Unevenly cooked corn often occurs due to overcrowding the pot. Ensure you have enough space for each ear to cook evenly. You can also stagger the corn in the pot for better water circulation.
Beyond Boiling: Other Cooking Methods
While boiling is a classic method, there are other ways to cook corn on the cob. These methods can offer different flavors and textures:
- Grilling: Grilling corn on the cob imparts a smoky char and enhances its sweetness.
- Steaming: Steaming corn is a healthy alternative that preserves its nutrients.
- Microwaving: Microwaving is a quick and convenient option, perfect for smaller quantities.
- Roasting: Roasting corn in the oven adds a unique texture and flavor, particularly if you add herbs and spices.
Serving and Storage
Boiled corn is delicious served hot, often with butter, salt, pepper, or other seasonings. However, you can also serve it cold as a refreshing side dish. To store leftover corn, allow it to cool completely before wrapping it in plastic wrap or placing it in an airtight container in the refrigerator. It should remain fresh for up to 3 days.
Mastering the art of boiling corn on the cob is a skill that will enhance your cooking and impress your guests. With this guide, you’ll be well on your way to enjoying perfectly cooked, sweet, and juicy corn every time.

