Mastering the Dotting Tool: Your Ultimate Guide to Exquisite Nail Art
The humble dotting tool. A seemingly simple implement, yet capable of transforming ordinary nails into miniature masterpieces. From delicate polka dots to intricate floral designs, this versatile tool unlocks a world of creative possibilities for nail art enthusiasts of all skill levels. This comprehensive guide will explore everything you need to know about dotting tools, from choosing the right one to mastering various techniques and inspiring designs.
Understanding Dotting Tools: Types and Materials
Dotting tools come in various shapes, sizes, and materials, each offering unique advantages. Understanding these differences is crucial for achieving precise and aesthetically pleasing results.
Types of Dotting Tools:
- Double-ended dotting tools: These offer two different sized dots, providing versatility without needing to switch tools.
- Single-ended dotting tools: These feature a single dotting ball, ideal for consistent dot sizes.
- Stylus dotting tools: Offering a pointed tip for fine details in addition to a dotting ball.
- Sets: Many sets offer a variety of sizes, catering to diverse design needs.
Materials:
- Metal: Durable and easy to clean, metal dotting tools are a popular choice. They provide a precise application.
- Plastic: More affordable, but potentially less durable than metal. They may not offer the same level of precision.
- Silicone: Soft and flexible, silicone tools are gentler on the nail surface and easy to control for delicate designs.
Choosing the Right Dotting Tool for You
Selecting the appropriate dotting tool depends on your skill level and desired outcome. Beginners might find double-ended tools or sets beneficial, while experienced artists may prefer individual tools for greater control. Consider the size of dots you want to create. Larger dots require larger balls, while tiny details necessitate finer tools.
Essential Techniques for Using a Dotting Tool
Mastering the dotting tool involves more than simply dipping it in polish. Proper technique ensures clean, even dots and prevents smudging.
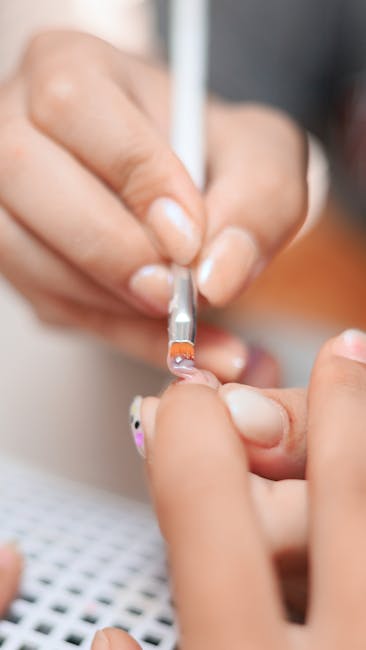
Dipping the Dotting Tool:
Avoid over-dipping the tool. A small amount of polish is sufficient to create a perfect dot. Excess polish will lead to messy results and create uneven dots. Gently wipe any excess polish on the bottle’s neck or a paper towel.
Applying the Dot:
Use a light touch when applying the dot. Press firmly enough to create a clean dot, but avoid pressing too hard, which can distort the shape or smudge the surrounding polish.
Cleaning Your Dotting Tool:
Cleaning your dotting tool immediately after use is crucial for maintaining its functionality and preventing polish from hardening on the tip. Use nail polish remover and a lint-free cloth or cotton swab to remove all traces of polish.
Stunning Nail Art Designs Using a Dotting Tool
Once you’ve mastered the basics, the world of dotting tool nail art is your oyster! Let’s explore some inspiring designs:
Simple Polka Dots:
A classic and timeless design. Experiment with different color combinations and dot sizes for a unique look. Try gradients for a more sophisticated touch.
Floral Designs:
Create delicate flowers using various dot sizes and colors. Combine dots with thin lines created using a striper brush or toothpick for enhanced detail. Experiment with different flower types like daisies, roses, or sunflowers.
Geometric Patterns:
From simple lines and dots to intricate mandalas, dotting tools allow for a variety of geometric designs. Try creating stripes, chevrons, or even more complex patterns using a combination of dots and lines.
Animal Prints:
Create fun animal prints like dalmatian spots, cheetah spots, or even leopard spots by using a combination of different dot sizes and colors. Experiment with color layering for a more realistic look.
Abstract Designs:
Let your creativity flow! Experiment with various colors, dot sizes, and patterns to create unique abstract nail art. Try blending colors for a subtle gradient effect.
Tips and Tricks for Advanced Dotting Tool Techniques
As you gain experience, you can explore advanced techniques to elevate your dotting tool nail art:
- Water marbling: Create mesmerizing water marble effects using your dotting tool to apply polish drops onto the water surface.
- Reverse stamping: Use a stamping plate and your dotting tool to apply intricate designs onto your nails.
- Color blocking: Combine dotting with color blocking to create unique and eye-catching designs.
- Layering: Layer dots to create depth and dimension in your designs.
- Mixing mediums: Experiment with different nail art mediums such as glitter or foils alongside your dotting tool.
Choosing the Right Polish for Dotting
The type of polish you use can significantly affect the outcome of your dotting tool nail art. Thicker polishes tend to produce more defined dots, while thinner polishes might be easier to blend but create less precise results. Experiment with different consistencies to find what best suits your preferences and desired effect.
Care and Maintenance of Your Dotting Tools
Proper care ensures your dotting tools last for years. Always clean your tools immediately after each use. Store them in a case to prevent damage and keep them organized. Regularly inspect them for wear and tear; replace damaged tools promptly to maintain the quality of your nail art.
Conclusion
The dotting tool is a versatile and accessible tool that opens up a world of creative possibilities for nail art. With practice and experimentation, you can master various techniques and create stunning designs. So, grab your dotting tool, choose your favorite colors, and unleash your inner artist!
